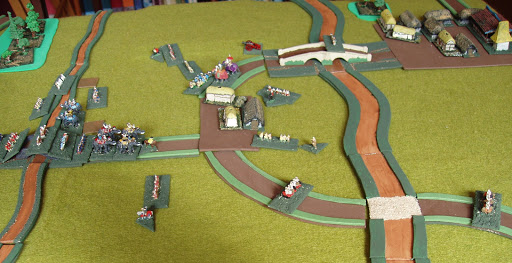
Saturday 26 December 2020

Fifty Historical Wargames You Should Play Before You Die

 There have been a plethora of ‘bucket list’ type books published recently, along the lines of ‘Fifty Places You Should See…’ before you become incapable. Probably these are representative of the angst of our age. Quite likely also that they are writers and publishers spotting a decent gap in the market to make some money.

Never having been one to duck a cultural challenge, of course, I have tried to come up with my own list. Or rather, I have come up with a challenge to my loyal reader. After all, why should I do the hard thinking, particularly at Yuletide, when I can get someone else to contribute. You have heard of ‘crowdfunding’, now let us try ‘crowdthinking’.

So, the challenge is to think of fifty historical battles which are wargamable and which are interesting and / or instructive enough to be worth putting effort into wargaming. Being mostly an ancients and early modern wargamer, I suspect that choices will be deeply biased. But, you never know, we might get a book out of it.

My contributions, in no particular order, with a few extra notes:

1. Marathon: The granddaddy of all the historical battles, with so much speculation for just a few paragraphs in Herodotus. Also, it was the subject of one of the first wargame articles I read, way back when, by Charles Grant in ‘Military Modelling’.

2. Edgehill: I have always thought of this as one of the most interesting ECW battles, because neither side really had a clue what they were doing, nor how it should go. More or less any outcome, therefore, seems historically acceptable. Getting wargame rules to accept than an army, having lost both wings and one-third of the centre, can still nearly win is a bit of a challenge, though.

3. Pavia: Or, how to handle early sixteenth-century arquebus units correctly. Not only that, but it was an interesting battle, had significant consequences internationally and the Italian Wars are nothing if not colourful.

4. Issus: You have to have something Alexandrian, don’t you? Even if you think he was a violent, drunken lunatic with absolutely zero self-control and a god complex, he could command a decent battle, although in the Persians under Darius he was not facing the cream of possible opponents. Alexander had also got himself outmanoeuvred strategically, a point which a lot of Alexander worshippers tend to overlook, and he had no choice but to fight his way out of a tight corner.

5. Cremona: The answer to the question ‘who did the Romans mostly fight?’ is, of course, Romans. So one of the civil war battles is a given. I could have picked Caesar against Pompey, but the Year of the Four Caesars will certainly throw up a few interesting conflicts, and the second battle of Cremona is one, detailed in Tacitus’ The Histories.

6. Khanua: Given the nature of the blog, I have to go a little exotic with my list, at least, and the second great battle of Babur, against the Rajputs, seems to fit the bill. Much harder fought than Panipat, but decisive use of firepower again seems to have won the day.

7. Nagashino: Another, more exotic (although probably more familiar to wargamers) battle, again with firepower as the deciding influence. But who can fail to be seduced by the Samurai and their armour? I mean, come on, we are only human, are we not? Fanatical loonies, desperate cavalry charges against prepared defences, what is not to like?

8. Agincourt: Proof, if proof were needed, that some people do not learn from experience. The French, having an ‘army in being’, did not really need to attack Henry, but of course, you need to do the honourable and chivalrous thing and blunder through a muddy field to be present an obliging target to be shot down by Welsh archers. Sarcasm aside, of course, it is an interesting tactical problem – how do you launch heavy infantry at a more mobile firepower army?

9. Ramillies: Of course, Marlborough has to be in anyone's list of good generals, and Ramillies is a masterpiece. It also throws up some interesting questions about grand tactical movement on the battlefield, and French generals buying into feints. It was also a bit before Marlborough's opponents had noticed his habit of pinning their forces and then breaking through somewhere else.

10. Vienna 1683: Of course, the first Ottoman siege of Vienna is interesting, but 1683 combines all sorts of aspects into one major battle, with a wide variety of troop types from Polish hussars to Western European line infantry, along with Janissaries, Ottoman irregulars and so on. As the last gasp of a failing empire (sort of, the Ottoman Empire lasted until 1918, which hardly suggests imminent collapse in 1683) it also has a great deal of strategic interest.

So, my contribution for ten battles. I have tried to avoid fights I know little about (and you have failed, I hear the critics cry). I dare say there may well be cries for Waterloo, D-Day or Stalingrad, along with Gettysburg Minden or similar. I am not going to argue from my normal basis or ignorance.

I have put ten battles up, which I think are all wargamable, and so, according to the title, there are only another 40 to go. So, over to you. Suggestions in the comments please, and if you can add a paragraph of justification, so much the better. Given that today is Boxing Day (the Feast of St Stephen) when, traditionally, games and puzzles are played, this is your starter to the festive season.

Finally, as is usual in recent years, here are the latest version of the WotCR rules, for anyone interested.

And a very Merry Christmas to you all.

Saturday 19 December 2020

The Lead Pile


Army

Infantry

Cavalry

Other

Total

Spanish

66

27


93

Companions


36


36

Persians

256

21

6 chariots

299

Imitation Legionaries

32


32

Thessalian Cavalry


48


48

Theophorus

80


80

Moors

120


120

Parthians

48

112


162

Celts

80

21

4 chariots

105

Bolt Shooters


4 (Greek)

4

Marian Romans

48

12

4 bolt shooters

64

Macedonians

32

18


50

Germans

136


136

Dacians

120

18


138

Totals

1018

313

18

1349

Ancients


Army

Infantry

Cavalry

Other

Total

Irish ECW

276


276

Scottish ECW

144

117


261

Anglo-Dutch WSS

52

30


82

Danish GNW

8


8

Bavarian WSS

64

24


88

Polish GNW

48

48


96

Unassiged WSS

88


88

Totals

592

219


899

Early Moderns


Overall Total: 2248


I told the Estimable Mrs P. That I had counted up my lead pile. ‘I am not sure,’ she told me, severely, ‘that I think that was a good idea.’ She may well be right, that it was not such a good idea. All I can say in my defence is that my box containing the ancients lead pile has felt a lot lighter since painting the second Sarmatian army, and my shoe box of shame, containing unpainted terrain items, is nearly empty.


The above tables show the results. I confess that the numbers in part intimidate me, and in part are rather fewer than I expected. On the other hand, most of the ancients lead pile is over a decade old, and the WSS and GNW armies are very old Baccus 100 AP DBR forces which, a long, long time ago, I suggested that Mr Berry create and sell. They are quite nice starter armies, or at least they were for me. However, I do get a bit fed up painting uniforms. I also get fed up painting in general, as well.


It is as well to look on the upside of such tables, I feel. Many of the ancients are left overs from constructing the armies in the first place, and then doubling them. The Parthians have not been doubled, admittedly, but they are the only ones on the above list. The Celts, Marian Romans and other bits are just that, left over bits. The un-doubled armies are the Persians, for whom I have plenty of infantry (for the early brand, anyway) but not much cavalry.


The ECW purchases are new. I mean as an ECW fan who can resist the Irish, even if they are, I presume, destined for Montrose’s army. And the Scots need a bit of beefing up with specific cavalry (the Armada Abbeys Campaign has run on Scottish lancers to date), and I need to double the number of musketeer bases, and may as will finish the remaining highlanders while I am about it.


On the other hand, I can point to some solid achievements this year. I just do not write them down, so cannot tabulate them that easily, but it is a fair bit by my book. I have, for example, more than doubled the Sarmatians; as I recall that was about 160 figures or so, all cavalry. I have painted a load of Hussites as well, which are a bit difficult to assess in terms of the above analysis – 12 war wagons with 9 crew each, plus sixteen bases of flail wielding men, assorted cavalry, generals, Polish war waggons and two carroccio wagons. I estimate around 220 figures for that. I also painted a load of spearmen, crossbowmen and handgunners for the Reconquista campaign, which seems to be about 280 figures if memory serves correctly.


So on that estimate painting totals for this year are around 668. However, there are also 90 cuirassiers and 48 Irish infantry to be taken into account, some siege engines and, I think, 48 crew, some buildings (two mosques, two donjons and some castle bits, at least), and twenty-eight small boats from new and twenty-four repainted. I have also painted some terrain and a load of hedges. For someone who does not like painting, I seem to have done quite a lot.


The rebasing project has nearly finished. All of the main armies, of whom the Danes are the last, are rebased. I have some Heroics and Ros artillery to redo, and I am, as mentioned last week considering re-rebasing the Aztecs to reduce the number of bases and make them usable. Mind you, I also managed to drop the Aztec boxes and damage some of the bases, so a few do need redoing anyway.


Overall, then, I reckon I can paint, say, one thousand figures in a year, which means my lead pile will last just over two years. It is a wee bit more complicated than that however. There is a limit to, say, the number of scythed chariots that I need. I already have four, I think, painted and based. There are another six in waiting, but for a twenty base army do I really need ten? That does not, of course, mean that I will not paint them; after all, the term ‘need’ when applied to wargame figures is a bit of an odd usage.


So, if I swear off buying any more figures I can probably aim to halve the lead pile next year, which would be nice. After all, at one point (I think after the small boats order to Tumbling Dice) the Estimable Mrs P., gallantly trying to take an interest in her husband’s antics, asked what else I had to paint. Upon being told some of the highlights from the above list, she responded ‘If I had known that, I might not have sanctioned the boats.’


So, solid progress on the lead pile is required, but I do need to chop the quantities up into manageable chunks. I can manage to base about twenty bases at a time, so that gives a maximum throughput, per batch for basing, of about 140 (120 – 160, depending on whether they are cavalry or infantry). On the other hand, my stated aim for my wargaming activities are to reduce time spent painting and increase that spent having games.

Saturday 12 December 2020

How (Not) to Take Over the World

 Those of you with long memories might recall my escapades in rebasing Aztecs, and the vast quantity thereof I seem to have. Plans are afoot for reducing the number of bases, incidentally, but meanwhile, what of my plans to become the new Emperor of the known world, in this case, Mexico before the Spanish arrived.


Anyway, following my starting of a campaign to become Emperor of Mexico, you might recall that I started with a success against some Chichimec raiders. I admit that they are not exactly a dangerous foe but in DBA they are a bit tricky, as actually destroying any skirmishers is a bit of a task. They tend, after all, to run away rather than stand up and be destroyed like proper soldiers.


One of the key quantities in the campaign is the ruler’s personal rating. The higher the better, of course. The higher your rating, the more likely cities are to surrender to you without a fight, for example. Plus, you are less likely to be assassinated by disgruntled nobles. Your rating starts at 7 and is increased by one for each battle won, decreased by two for each battle lost, but increased by one for each city conquered or surrendered. On the other hand, you lose one if you withdraw from a battle without fighting.


As a consequence of my victory against the Chichimec raiders, my rating became 8, so then, in the second part of the first turn I moved on Tlacopan, albeit with a DBA army of 11 bases, having lost an auxiliary base (that is, Aztec warriors) against the raiders. A bit of dice rolling and card drawing indicated that the residents of Tlacopan were not impressed by my imperial credentials (at least, not yet) and defied me, calling in their allies to face me with eighteen bases (excluding any hidden in ambush). Granted the allies were all skirmishers, but eighteen against eleven did not seem great odds to me, even so.


After some time pondering the odds (the last battle, you might have noted, was fought in October 2019) I decided to take the hit to my personal rating and withdraw. My personal rating dropped back to 7. That was the end of turn one of the campaign, so I regained the missing base of my army to be at full strength for the next turn.


This time there was no random event, so it became my move immediately. I decided to attack Tlateloco. The residents drew a three on their resistance card, from which my rating was subtracted and another card (a ten, in this case) was added to their resistance total. Thus I had to roll more than six on a D20 for them to surrender without violence. No problem, I thought, and rolled – a six, of course.


So, I thought, these people wish to defy me. Very well, battle will be joined. Drawing up their army they had the normal DBA Mexica array of 3 blades (suit wearers), six auxilia (warriors), and three psiloi (skirmishers), plus an extra ally, of another three skirmishers. No problem with that, I was confident in my newly reinforced and up to strength army.


For reasons I’m not entirely sure about the pictures are not brilliant (they never are with me at the helm, I know, but these seem to me to be worse than usual), but anyway, above are the initial dispositions. In the distance, you can see my brave lads, ready to roll over the foe. I have to say that the campaign game does give some real use for skirmishers, as in this case, the terrain features may contain ambushes if they are in the enemies half of the table. Thus I can use my skirmishers to ‘spring’ and ambushes before the main body arrives.


In the campaign I have ten moves in which to win the battle. I managed to lose it in six. The picture above shows the end of the game. Conspicuous by my absence, you will note that the Aztec general’s base is missing, along with two bases of suit wearers. In DBA terms this means that I have lost. What, you might ask, went wrong?


We await the results of the full public inquiry into the battle, of course, as well as the Royal Commission. However, a few facts are clear. Firstly, there were no ambushes, so they cannot be used as an excuse. The advance of my army was a bit disrupted by pesky skirmishers so my warriors never really got into full combat. However, it was the other flank that turned into a disaster where my suit-wearers got flanked by the enemy and I lost two bases, the second one including the general.


I then had to roll for the fate of the said general, my good self in this case. Fortunately, I rolled low and my flesh, at least, was preserved intact. My reputation as a general, however, took a bit of a pounding and my rating fell to five. Ho, as they say, hum.


I now have to take turn three with an army lacking a suit wearer base, which might make things a bit tricky if I have to fight again. I have to confess that I was probably over-confident in my assault on Tlateloco, especially when no ambushes were discovered. It was a bit ‘hey diddle diddle, straight up the middle’ but my defense is that with the terrain lay out, I did not have much choice.


Still, upwards and onwards as they say. I have to confess that there is a certain satisfaction in designing a campaign system that can beat me in battle. Actually, the last time around, I not only lost in battle but I also eventually lost my life to an ambush. It was a bit like things could happen in real life I suppose, I was desperately trying to shore up my position by winning a battle to restore my reputation when some idiot bashed me on the head with a wooden sword. I hope to do better this time.

Saturday 5 December 2020

What Happened Next?

Two of the great dangers of reading any given bit of history are the questions ‘what happened before?’ and ‘what happened next?’ As my loyal reader will be aware, I have got a little interested (Do all those books represent a ‘little interest’? - ed.) in the Domesday Book and hence the invasion of William, Duke of Normandy, Bastard and Conqueror.


The astute reader will have noticed that I have, to a small extent, answered the first question by reading Stenton and one or two other works which have filled in the Anglo-Saxon and Viking background to the invasions, although I have still not quite got my head around the complexities of the politics. So the second question reared its ugly head.


In an effort to find out what happened next, I bought and read a (second hand but excellent condition) this:


Bartlett, R. (2000). England Under the Norman and Angevin Kings 1075 - 1225. Oxford: OUP.


This is a weighty tome in the ‘New Oxford History of England’ series; Stenton, of course, being in the ‘Oxford History of England’ series. So my engagement with the scholarship has moved up a gear.


Unfortunately, Bartlett (which is a very good book and one to which I shall return, possibly in a future post) assumes that you already know something about the period, which I do not, or at least, did not. I am a firm believer that you cannot do thematic history without some idea at least of the narrative sweep of the period in which you are interested. I, therefore, cast about for a narrative for a bear of little brain, and found this:


Cole, T. (2018). After the Conquest: The Divided Realm 1066 - 1135. Stroud: Amberley.


You might recall that I was perhaps a little sniffy about Cole’s book on the Norman Conquest, but then I am perhaps a little sniffy about the Norman Conquest per se. You might also notice that I am studying the period the wrong way around by my own precepts: the narrative after the thematic. All I can say is that I thought there might be a little bit of narrative in Bartlett (there was, but not enough for me to get a handle on it) so I decided to go for a story. As someone says somewhere (I think it might be Aquinas) there is a way of discovery and a way of teaching, and they are not the same.


Anyway, both Cole and Bartlett make the same point. When BtB went down to a probable equestrian accident in 1087 in Normandy, he left his sons with several problems. Firstly, of course, there was the problem of each other – Robert, William and Henry. William gave Robert Normandy, in spite of the fact he kept rebelling against his father, William England and Henry £5000, which was a lot of money but no land. There was little in the way of a tradition of primogeniture at the time, so no-one could really claim that Robert should have got the lot (although it did not stop Robert, of course, from time to time).


There was also the problem of ruling both England and Normandy either separately or together. There were Anglo-Norman lords who held lands in both places, and who therefore were forced to pay homage to both the Duke of Normandy and the King of England. This was fine so long as the King and Duke were the same person, but when, as in 1087, the roles were split, there were inevitably issues arising, both between the brothers and between one of them and a vassal who considered another to be more important or useful to them than their liege lord.


To this mess of pottage should be added the fact that the Duke of Normandy owed homage to the King of France while no King of England was going to be seen dead paying any sort of homage to the said monarch. Further, we can add issues between England, Scotland, and the various Welsh kingdoms as the Normans penetrated Wales and the fact that the Norman barons kept raiding, fighting and generally causing mayhem within Normandy, requiring strong leadership which, in Duke Robert, they did not seem to get.


As you can imagine, it all got a bit complicated, especially when the crusades were added in. Robert, on the losing end of a war with his brothers agreed to pawn Normandy to William and go on the First Crusade. Henry and William proceeded to fall out and patch things up until William (Rufus) was on the receiving end of a hunting accident in the New Forest. As Cole points out this was a kind of convenient accident for Henry, as he was in the same hunting party and managed to get to Winchester and secure the royal treasury and be crowned King of England more or less before his brother’s body hit the ground.


Cole is generous enough to suggest that there might be other culprits for staging the tragic accident. After all, medieval kings were never the most popular of people around. The King of France was by no means displeased to find William no longer a factor in Normandy, while Robert, although a long way away, might also have supposed there was an opportunity. Henry, the man on the spot, took full advantage but was then faced with the same problem of Normandy which had baffled his siblings (and, for that matter, his father).


Henry solved the problem by conquering Normandy himself and capturing Robert, who was held in prison for the rest of his life. His reign saw the starting of the English Common Law tradition as well as a number of other innovations and his realm of England at least was broadly settled, although used as a cash cow for military adventures in France, and for marrying his daughter, Matilda to the Holy Roman Emperor’s son. However, the drowning of Henry’s son William in the ‘White Ship’, an affair of a great deal of drink and some rocks outside the harbour left a problem for the next reign. Would Henry’s nephew, Stephen, or his daughter get crowned next.


Now, as they say, read on….

Saturday 28 November 2020

The Armada of Flanders

 Your starter for ten: When was Spanish naval power in the North at its height?


To make it easier, have some multiple choice options: A: 1634 B: 1588 C: 1609


Many people, myself included, would probably have answered B. Even though the Armada lost, the Spanish did sail with a fair degree of impunity up the Channel and, subsequently, around the British Isles and back to the ports of northern Spain. Most modern historiography suggests that the weather and bad communications caused the Armada’s loss, not the actions of the English navy.


However, a book I have just read:


Stradling, R. A. (1992). The Armada of Flanders: Spanish Maritime Policy and European War 1568 - 1668. Cambridge: CUP.


suggests otherwise. Stradling argues convincingly that the Spanish controlled fleet, the Armada of Flanders, was at its peak during the 1630s when it took the fight to the Dutch (in particular) in the narrow seas.


Much of the earlier effort had been on land. Alba had spent his effort, and the initial Army of Flanders in attempting to suppress the rebellion of the provinces. The 1572 influx of Sea Beggars into the ports of Zealand was related to diplomatic pressure on Elizabeth of England to reduce piracy in the Channel, as the Dutch exile had little choice but to lurk in English ports and snap up passing Spanish merchantmen.


The subsequent war, down to the 1609 truce, was mainly land-based and normally related to siege warfare. A lot of the aquatic part of it was fought out with small boats on flooded plains around besieged cities. The Duke of Parma, famously, did not have the vessels (or, in fact, the facilities) to break the Dutch blockade of the Low Countries ports to get his army out into the Channel, let alone land it in England. But that situation did not have to be the case.


Parma, of course, was distracted by intervention in the French wars of religion after 1588, and little further progress was made. The memory of the Sea Beggars lived on, however, and, as the Dutch maritime trade empire grew, strategists and theorists in Spain began to argue for an armada based in Flanders. It could they thought, pay for itself by privateering and place a huge pressure on the Dutch who relied on trade and fishing for much of their income.


A problem was ports, and a great deal of investment was needed to make Dunkirk a viable base for a fleet. Nevertheless, this was accomplished and by the time the war with the Dutch restarted in 1621 the Spanish strategy was clear. The Army of Flanders was to remain on the defensive (it did so at least after 1629; sieges were extremely expensive in terms of money, men, and material) while the pressure on the Dutch was to be maintained by a new fleet based in Dunkirk. This would intercept the Dutch trade with Iberia and beyond as well as raid the fishing fleets, thus tackling both of the main income streams for the Dutch state.


It worked rather well for about a decade. The Armada of Flanders became quite quickly an elite force within the Spanish navy (at least according to Stradling). It achieved many of its strategic aims – the Dutch maritime trade did fell the pressure. So long as money was available from Spain for its operation and maintenance, the ships could slip in and out of Dunkirk past blockading Dutch squadrons and wreak havoc among shipping and fishing fleets. The Dunkirkers became a feared privateer force as well; entrepreneurs obtained licenses to take ‘enemy’ shipping, so long as they brought it into Dunkirk and it was sold via the Admiralty courts, the crown taking its percentage.


Strategically it was a win for Spain as well. The famous Spanish Road from Italy to the Low Countries, along which reinforcements and money flowed for the Army of Flanders was pretty well cut by 1630, and the Spanish could then use the sea route along the Channel, protected, in part, by the Armada of Flanders. According to Stradling in the decade of the 1630s nearly twenty-eight and a half thousand reinforcements arrived by sea, as opposed to nearly twenty-three thousand by land. These latter, I suppose, included those Spanish troops who had fought at Nordlingen with the Cardinal-Infante.


It did not, of course, last. War with France brought additional problems for the fleet, although it also provided extra targets. In 1639 the Battle of the Downs saw the destruction of a large number of reinforcements for Flanders, although it did not bring about overall Franco-Dutch naval supremacy. In 1640, however, the pigeons started to come home to roost for the overstretched Spanish imperial system. Portugal and Catalonia both rebelled, and, allied to the Dutch and French, proved difficult to reconquer (Portugal never was, of course). The naval resources were required in Spanish waters and the Armada of Flanders spent much of the rest of its time based in Cadiz, operating relief convoys to besieged cities in the south.


Dunkirk still operated as a privateer port, but without much central direction. In other words, it proved a pain still to the British and the Dutch. One of the French war aims became the capture of Dunkirk and, after a fair old struggle, it fell in September 1646. Of course, by this time the British polity had fallen apart into civil war and the Royal Navy (or Commonwealth Navy, as the Ship-Money fleet should probably be called) was not intervening.


That was not the end, however. In 1652, as part of the ongoing struggle between France and Spain with added allies of the Commonwealth regime now at war with France, the Spanish recaptured Dunkirk in 1652. The end, so far as the Spanish went, came in 1658 when the Cromwellian British, allied now to France, besieged the port, forcing the Spanish to attempt to relieve it, which effort was crushed at the battle of the Dune. Dunkirk became British, at least until Charles II sold it to Louis XIV in 1662, at it could resume its privateer trade.

Saturday 21 November 2020

Armies, Chivalry and Warfare

It is one of those odder aspects of writing this blog that, as a wargame blog, the actual wargames seem to be of less interest than my musings on history and historiography, at least according to the statistics which Google records of views. Of course, they are highly dubious sorts of statistics, a bit like counting how many friends you have from your Facebook page.

Nevertheless, those posts with less wargame content, such as the posts about Stanton and Oman, get less attention, even from Russian ‘bot nets, than wargames and toy soldiers, even odd ones like Hussites. Mind you, there are two issues at least here: firstly, originally, the blog was notorious for not having many pictures of toy soldiers on it, largely because I was not playing many wargames at the time, and secondly, I do have a tendency to skip over other people’s wargame reports myself, so I imagine most others do the same.

Anyway, after a spate of actual wargame reports, it is time for a bit more historiography. I have been reading:

Strickland, M. (Ed.) (1998). Armies, Chivalry and Warfare in Medieval Britain and France. Stamford: Paul Watkins.

As the title implies, this is an edited volume of academic papers, actually the proceedings of a symposium in 1995, which itself is part of a series. As an academic tome, of course, the price was high, but with twenty essays at two pounds apiece, you cannot really argue.

I got the book largely because it has a companion piece on ‘waste’ in the Domesday Book to the one in ‘The Medieval Military Revolution’ which I wrote about a few weeks ago. That focussed on the south and whether you can track the movement of armies via statements of waste. This one focusses more on the north and the extent of devastation wrought by the Harrying of the North.

Having bought the book, however, it seemed impolite as well as expensive just to read the one essay. It being a compilation of pieces it covers a wide range of stuff, ranging from the influence of Constantinople on Welsh castles, how field armies in Normandy were organised during the English occupation, tournaments in Scotland and a plethora of others. For those of us who are dilettantes in the ways of academic history, some of it is interesting, some of it is a bit ‘why did you write about that?’ but mostly it is fascinating, trying to get beyond the drums and trumpets of military history so beloved of wargamers to something that might indicate exactly how and why people fought and what they, and their society, thought about it.

How people thought about was is, of course, where the middle bit of the book’s title cones in. Chivalry, in its various forms, informed how war was conducted, or how people thought it should be conducted, at least at the higher levels of society. Sonya Cameron’s artilce on Chivalry in Barbour’s Bruce notes that there was an ambiguous relationship between the concepts of chivalry as being courteous to your enemies, never being mean or underhand and so on, and the way that the Scots under Bruce actually fought. Indeed, there is an implication at some points of the poem that those who did fight chivalrously were being, well, a bit thick. Not only that but, if they decided to fight rather than run away when the odds were against them, as some did on both sides, they had a tendency to land up dead.

The problem with books such as this is you land up with a whole load more stuff on you aspirational reading list. For example, Tony Goodman makes a ‘preliminary survey’ of the defence of Northumberland. Those who know me will be aware that I have an interest in the Scottish Borders, and so this was an interesting read. The only problem is that it added about half a dozen items to my reading list, on a topic – the medieval borders – which I am not sure I really want to make a focus. As I tell my students from time to time, you need to read with a question in mind, not just because a text you have read directs you to it. On the other hand, that is a suggestion for research students, not for hobby reading.

Still, for the real hardcore wargamer, there are essays of interest. Kelly De Vries describes the ‘forgotten’ battle of Bevershoulsveld, and suggests that gunpowder was an important factor. In fact, he argues that it was the first battle in which gunpowder was a significant factor. Perhaps it is not quite such a forgotten battle, as Bert Hall mentions it in Weapons and Warfare in Renaissance Europe, but pretty obscure, nevertheless. In case you were wondering, the battle was fought on 3rd May 1382.

Matthew Bennett follows that with a discussion of the ‘myth’ of the supremacy of knightly cavalry. Cavalry, he argues, did become more important as the medieval period developed. Hastings is often pointed to as being the point at which infantry yielded the battlefield to the knight, but Hastings was an unusual battle. Part of the problem, it seems to me, is that all battles are unusual and we cannot, therefore, compare one battle with another a delimit the ascendency of the knight, or the longbow, or any other weapon system, for that matter. Bennett makes two points which I think might be useful for wargame rules writers: up to the invention of the bayonet and platoon firing, foot could not advance on cavalry with expectation of success; conversely, cavalry could not make any impression on foot that kept their formation.

I could go on, of course, at some length. But the point to be made here is that even modern military history can make interesting observations about things pertaining to the drums and trumpets required to write wargame rules or play wargames. If anyone exhibits any interest in the above bits, I might write a more detailed account of the essays. In fact, I might anyway, just because they are interesting in their own right.

Saturday 14 November 2020

The Citrus Campaign - Part III

‘Read it out.’

‘Um, yes, sire. “Mandy, We’ve got ashore. Meet us at Neac ASAP. Hope you’ve dried your socks. Clemmy and Sally.”’

‘Do we have any idea where they are?’

‘Sire, Lord Clementine landed north of Eppeid, and Lord Satsuma landed at the port. I believe that they had to fight off some Korean and Chinese troops in order to make the bridgehead.’

‘So they’ve already had to do some fighting?’

‘I believe so, sire, and that Lord Clementine was wounded at the head of his troops.’

‘That will never do. We must advance and hope an army opposes us!’

‘Yes, sire.’

*

As you will doubtless recall (if not, have a look at the campaign page to the right), three armies of 1590s era Japanese, led by three bored young Samurai, have invaded Korea separately from the main force, looking for some fighting and some extra land. Lord Satsuma had a hard fight to land at a port (yes, it is Dieppe spelt backwards, for you World War Two aficionados) and had to be rescued by Lord Clementine’s army which had landed on a beach further north, unopposed. This is the activities of the third army, led by Lord ‘Mandy’ Mandarin.


Mandy’s men landed unopposed to the south of the others and has now been requested to march inland. Needless to say, the Koreans take a less than rosy view of this intrusion and have rallied an army to delay Mandy’s men as they head inland. The scenario actually is the first one from Grant and Asquith’s Scenarios for all Ages, adjusted to period, taste and resources.


Mandy has thirty moves to cross the table and exit by the road. I had to think for a while about Korean dispositions and tactics, and decided eventually on a partial ambush while holding the pass on the ridge. The Japanese order of march was established (Samurai first, of course) and off we went.


In the picture, Mandy’s men are, of course, on the road. Assorted Korean bowmen lurk in the woods, while half the cavalry is behind the nearer trees. The rest are on the ridge except the rocket-men who are behind the ridge, but able to shoot over it.

Ambushes, on a reasonably large scale are, it seems to me, tricky things to pull off. The Korean mark of movement was when Mandy got to the second bend in the road. Then the rockets opened up and the bowmen and cavalry moved forward. 


A lot depended on the Korean cavalry. The group from ambush did their job, hit the front of the infantry column and swept away the lead element, pursuing them across towards the smaller wood. The cavalry group on the hill, however, refused to charge, enabling Mandy to turn his own cavalry and hit the Korean pursuers from behind, routing them. This included the general, who was lost. The second Korean cavalry element from ambush was held by a Samurai base and then itself eliminated.


The picture shows the ambush well and truly sprung. The fleeing bases, one from each side, can be seen at the top of the picture, while the arrow and shot fight goes on around the Japanese column. To the right, up a hill, Mandy is rallying his victorious cavalry while the Korean rocket battery is taking its toll on the other cavalry base. In fact, the bombardment became too much for them and they broke a few moves after the picture was taken.

It took a while for both sides to reorganise after the initial fighting. Mandy got his cavalry moving again along with the Ashigaru rear guard and saw off the Korean bows on the far side. Meanwhile the remaining Korean cavalry started to lurk ominously and, indeed, they defeated the advancing Ashigaru blades. 


Mandy managed to reorganise too, however, and sent in the Samurai at the Korean spears and shot on the ridgeline. While the Korean cavalry rally from their successful charge in the distance, the spears have been beaten and the shot is now fleeing. The road to Neac lies open, although the Koreans had done a good job and Mandy only had eight moves left to get off the left-hand edge of the table.


I think that there are few lessons to be learnt here. Firstly, both armies are tough. The Japanese have a hard time dealing with the Korean cavalry. Historically, it is thought that contact with the Koreans increased the popularity of the spear-like yari. Secondly, as noted before, the Samurai are tough and hard to beat. Thirdly, generals are important. The Korean effort was hamstrung by the early loss of the general, and Mandy’s habit of charging off with the cavalry did the organisation of the Japanese response to the ambush no good at all. Indeed, he spent some valuable time charging and capturing the rocket battery, which took him out of sight of the battle and led to having to spend about four turns rallying and reordering his troops. While to rockets were annoying, they were not that critical to the action and Mandy could have done some other stuff with his time.


*

Here he is.’

Hi, Mandy. What kept you?’

Oh, you know. The usual. I had to do a lot of dashing around.’

Mandy, I thought you had loads more horses than that.’

Horses? Oh, you mean my cavalry? Well, yes, I do.’

So, where are they?’

Oh, I sent some of them on leave, you know. Gone to see their friends. I think most of them will be back in a day or so.’

You’ve just had a battle and you’ve sent some of the troops vital to our forces on leave?’

It was only a small battle, really. Not more than an inn brawl really. But you should have seen me, rushing around, commanding people, charging generals and capturing their bang-stick things. It was great!’

I don’t suppose you’ve brought any bang-stick things with you, have you?’

No. Why?’

How are we going to besiege Neac, then?’


Elephants Again

Every once in a while I get a craving to put elephants on the table. I do not know what it is about pachyderms, but every wargamer I know (which is not that many, admittedly) seems to want to launch elephants at the other die. Perhaps they are simply majestic. Perhaps it is the write-ups of early ancients wargamers who had elephants running amok. I really do not know, but nevertheless, sometimes you just have to put an elephant or two on the wargame table. It is one of those life things, I suppose.

Anyway, I was getting Nellie cravings again (ooh-er, missus) and looked back through my notes. My last adventure with elephants seems to have been over a year ago, so the cravings are hardly surprising. That was a scenario taken from Grant and Asquith’s Scenarios for All Ages book, so I pondered what to do next.

I could, of course, have ramped up another battle over the same terrain, except I was not sure I could create the terrain again. Nevertheless, I felt, the Vietnamese would be out to counter-attack somewhere. I flicked back to the previous scenario and started to modify it.

The result was that a Khmer army is snoozing quietly in a village, with an advanced outpost in a hamlet on the other side of the river. The Vietnamese are trying to sneak up on them.


As you might be able to see, the bulk of the Khmer army is in the rightmost village, with two skirmisher bases and the cavalry is the forward position. The stream is actually fordable, but the Vietnamese do not know that. They advance from the top right to try to surprise the Khmer. The troops, when they appear, are all irregular, the bridges and some of the buildings are Leven, other buildings are Irregular and very old Baccus. The trees are Irregular.

The Vietnamese appeared over the next few moves to try to forces the bridges and undermine the Khmer position. A degree of chaos naturally ensued, with the Khmer scrambling to activate troops and cross the river, while never having enough tempo points to achieve what they needed to. The Vietnamese drove straight at the hamlet and the forward position, hoping to overwhelm it before help arrived.


A swirling cavalry combat ensued, between the Khmer cavalry protecting the village (the only active Khmer element at the time) and the Vietnamese cavalry sent forward to surprise the village. After a few moves help arrived from the rest of the Khmer army, which you can see above straggling over their bridge, while the Vietnamese attempt to pile over theirs. In the background, you can see the Vietnamese rocket battery, which has been surprisingly effective at disrupting the Khmer reinforcements.

The combat between the Vietnamese bridge and the hamlet swirled around confusingly for a while. Both sides got their bowmen into position, and the Vietnamese bow attacked the Khmer to some effect, the latter losing a base to a crossbow base commanded by the general in person. More Khmer troops kept turning up (and being hit by rocket fire) while the elephants on both sides declined, repeatedly, to charge each other. Sensible animal, your average elephant, it seems to me, but it certainly frustrated the Vietnamese advance as the Nellies were now blocking the bridge.

In the meantime, after a very tough and evenly matched fight, the Khmer cavalry were routed and exited stage right, pursued by their opposite numbers. The Khmer army had just about woken up sufficiently to have started harassing the Vietnamese elephants with skirmishing fire (ineffectively) and they also brought their tribal foot up, in part to threaten the Vietnamese flank. The deciding activity was the charge of a tribal foot base on a bow element with the Vietnamese general attacked. After a couple of rounds of combat, the bows were routed, which meant that the general had to be diced for. He too was routed and the Vietnamese were now both not properly deployed and leaderless.


Above you can see the Khmer cavalry exiting, pursued by Vietnamese at the bottom right. You can also see the hole in the Vietnamese line where the bow and general used to be. The Khmer elephant has also charged a bow base and disposed of that, and the triumphant tribal foot on the far side have crossed the stream (the elephants failed to – their bit was crocodile infested) and eliminated to rocket battery. In the distance and behind the village you can see further Khmer elements assembling.

The Vietnamese struggled on for a few turns more but hit the problems of being without a general. Needing to deploy to get more troops across the bridge they generally failed to move at all. The cavalry attempted to rally at the ford, but came under skirmishing fire from the Khmer from the village and could not get their act together. Slowly the Khmer were building towards an assault on the Vietnamese elephants with their own rallied elephants, tribal foot and bows. At this point, the Vietnamese under-general decided that enough was enough. Surprise and the initiative were well and truly lost, and a retreat was the only way out.

A nice and interesting fun battle. I do like to have the elephants out from time to time, and I learnt a few things about my rules for this one. Firstly, I found that actually gathering my army lists into one place might be a good idea. Secondly, I changed the rocket firing rules so they had a chance to hit something without having to roll a six. They did a fair bit of disruption to the advancing Khmer until they were masked by their own troops. Thirdly, I think I have not got the hang of these armies yet. The Vietnamese relied on the cavalry, elephants and crossbowmen, and the latter were defeated by tribal foot from the other side. The Vietnamese army has in its ranks blade elements, and these, I think, should have been sent over the bridge sooner, perhaps even before the crossbows.

Still, we live and learn, and I dare say it will not be too long before I get more elephant cravings.

Saturday 7 November 2020

Small Boat Sailing

 ‘So, this is Spinoza’s will?’

‘Yes, ma’am.’

‘And what does it say?’

‘For the state, ma’am, he recommends establishing Dunkirk and Ostend as privateer bases.’

‘Already done.’

‘Also, he suggests not assaulting the rebel’s fortresses any more.’

‘Really? What are we to do instead. Madrid will not be happy with the answer ‘nothing’, you know.’

‘No, ma’am. He does not suggest nothing. We should use the ships from the armada, and the troops, to outflank the rebels from the sea, cut off their maritime trade and seize the undefended islands. If we can fortify the towns on the islands, then they will have to come to us while we throttle their trade.’

‘Cunning man that Ambrose.’

‘Yes, ma’am.’


*


As any discerning wargamer of the Seventeenth Century will know, the Hispano-Dutch wars, once it resumed in 1621, got bogged down in sieges, and no-one really got anywhere. The real action was at sea, both in the Narrow Seas (much of the Dutch trade was, in fact, with the Baltic) and also world-wide. With the East- and West-Indian Companies grabbing trade and trading posts across the Americas and the Indies.

According to Hugh Peter’s account in his pamphlet (‘Digitus Dei. Or Good News from Holland’ p 157-172 in Randall, D., English Military News Pamphlets 1513-1637 (Tempe, Arizona: ACMRS, 2011)), Spinoza left exactly that above suggestion in his will to ‘the Infanta’, Archduchess Isabella, co-ruler, ruler and governor of the Spanish Netherlands until 1633. Again, according to Peter this waterborne assault took place in September 1631 by over eighty Spanish ships. The Prince of Orange, Frederick Henry of Nassau had already retreated from his invasion of Flanders (possibly aimed at Dunkirk, but that might seem a little ambitious) and was forced to dispose of his army against the sea threat, and also launch a naval effort against the incoming fleet.

It all went wrong for the Spanish, many of the sips ran aground in a mist and the whole seems to have been a logistical nightmare. Hugh Peter, of course, acknowledges that the defeat was from God.

Never being one to pass up an excuse like that for a wargame, I pondered my naval assets. Peter actually provides a fairly useful list of troops, sailors and ships (as well as other equipment) which came to 3274 soldiers of all ranks captured, 855 sailors (out of 6000 who left Antwerp). Peter also lists 62 vessels captured although not all of them were warships; the ammunition ships are listed as carrying powder, beer and ‘Deals’, which might be planks or wine.

The geography described by Peter is confusing, at least, it confused the socks off me and, of course, modern maps are fairly useless as a great deal of draining has occurred. The landscape (seascape?) even seems to have changed between 1630 and 1660 as the engineers got to work. So I gave up the idea of a precise reproduction of the events, and went for something ‘inspired by’ them.

Further investigation of my small craft indicated two slight snags in the plan. Firstly, I did not have very many and secondly, the ones I did have were poorly painted even by my low standards. Two of the brigs, for example, had no paint at all applied to one side. Having sworn off Hallmark Miniatures, I was at a bit of a loss until I recalled that Tumbling Dice have assorted ranges in 1:2400, and an order was placed and swiftly despatched. I set to to paint somewhere around fifty craft – being a solo player means you have to have sufficient for both sides. However, it turns out that simple paint jobs on ships are nearly as easy as buildings, and the whole project was only delayed by a fortnight or two.

I did have to invent some terrain. The problem is that at 1:2400 scale, a six-foot-tall human is about 0.83 mm tall. Thus the edge of a piece of felt could be a six to eight-foot cliff. Further, no-one seems to do any buildings in 1:2400 scale, a problem which I have encountered before but not solved. So some imagination was required.

After a few moves, the table looked like this.


The Spanish are sailing from the near edge of the table, in a lump, headed by a ‘hulk’ flagship. Their aim is to capture the two villages to the left, the little brown felt squares. This will interdict maritime traffic from Bergen, in the distance, from which you can see the Dutch starting to emerge. The pale bits are sand-banks or dunes. The dark blue bit is the ‘danger area’ where unwary ships entering are likely to run aground. There is a channel or two through the dunes at the end of the island, through which some optimistic Spanish ships are aiming to pass.

You can also see that there is more clutter on the table than I usually like. These consist of a wind direction marker, a weather tracker (I had, after all, to give a chance for some mist) and a turn tracker, to keep an eye on the tides. The weather rules were nicked, incidentally, from Charles Wesencraft’s ‘With Musket and Pike’.

The main clash of the fleets was in the restricted waters to the starboard of the island. The table edge, of course, was the other shore, and the Dutch landed up being rather pinned against it.


The Dutch, under their admiral the Prince of Orange in the leading galleass split into two to shoot up the Spanish who sailed obligingly between them. However, most of the Dutch ships lost out in the artillery duel and the port squadron (nearest the camera) was forced to sheer off and ran aground, at least in part. While receiving some damage (you can make out the markers if you look) the Spanish sailed fairly serenely on. In the top left of the photograph, you can see the flying squadron has taken one of the villages with consummate ease, the relieving Dutch squadron being hampered by the wind.

It did not really get much better for the Dutch. Attempts to refloat the Prince’s ship led to it sinking (a failed refloat gives a possibility of damaging the ship), the Prince himself being unharmed by captured after struggling ashore. Most (even more?) embarrassingly, the starboard squadron of the Prince’s force largely ran aground trying to get through the channel in the dunes. The Spanish armada sailed on.


The picture shows the situation when I gave up. The Dutch relieving squadron is about to reach the second village; the Spanish main force will not, however, be far behind. To the right, you can see the remainder of the Prince’s squadron aground or struggling to catch up given their damage levels. Even if they do recover, they are going to struggle to get past their own ships as the tide is going out.

It is a good thing when a wargame leads to another. In this case, there are two – the Spanish assault on the second village, now defended by Dutch soldiers and sailors, and the Dutch assault on the first village, now defended by Spanish soldiers and sailors.


*


Prince Frederick Henry, ma’am.’

Ah, Freddy. Nice of you to drop by. Do come in. Have you dried out?’

I have been well treated.’

Excellent. Well, you know, we must set you a ransom. Your fellow traitors are quite keen to have you home, you know.’

A ransom?’

Yes. What shall we say? The whole of Zealand and Holland?’

Saturday 31 October 2020

The Medieval Military Revolution

One of the things I have banged on about on this blog over the years is the military revolution in early modern Europe. As my loyal reader will recall, this was first suggested in the 1950s by Michael Roberts, and extended in the 1980s by Geoffrey Parker and has generally stimulated a fair bit of historiography around the ideas of state formation, taxation and the increase in size in armed forces, particularly (although not exclusively) armies and fortifications.

The consequences have been perhaps, a great deal more heat than light, at least as far as the humble wargamer might go. How much the wargamer is interested in the details of state formation and military finance depends on the sort of person, at least so far as history goes, that one is. Most wargamers are not that interested in the financing of the Spanish army in the Low Countries in the 1580s, it seems to me. They are interested in the battle the army fought.

As I mentioned, however, one book leads to another. My readings on ‘waste’ in the Domesday Book have led me to:

Ayton, A., Price, J. L., eds. The Medieval Military Revolution: State, Society and Military Change in Medieval and Early Modern Europe (London: I. B. Taurus, 1998).

This is, of course, a book of essays on various aspects of the military in the period from around 1066 to the Seventeenth Century. I say around 1066 because the first essay is about whether the historian can trace the movements of William the Conqueror's army after Hastings by references to waste in the Domesday Book for the relevant counties. As I intend to return to this topic at a later date, I will leave the interested reader waiting for the answer to that one.

Having bought the thing (the university library is inaccessible, at present) I did what most red-blooded historical wargamers would do with a book, and read the essay I was interested in, and then the rest of them. And jolly interesting most of them were too.

To take the least wargaming relevant ones first, there are two essays on the just war in early modern Europe, one on the views of Erasmus of Rotterdam and the other on a Paris theologian Josse Clichtove. I had not heard of him either. Erasmus was a virtual pacifist, Clichtove was not. But the authors are at pains to observe that neither came to their views in a vacuum – the church had views on war and its conduct from the tenth century at the latest.

Other items of interest (the Estimable Mrs P observed when I was talking about the latest History Today issue ‘You say that all of the articles are interesting.’ Guilty as charged, I am afraid) include town defences after the Norman conquest, the gifting of land to the Templars (including two and a half carucates in the village in which I dwell – I shall have to look into that now as well) disputes about heraldry and what it tells us about the motivations to fight in the fourteenth century, the experience of Sir William Pelham, the Elizabethan engineer partially responsible for the defences of Berwick upon Tweed and the Dutch Republic and warfare.

Again, I shall come back to some of these topics, I suspect. But the overall question is tackled in the introduction by the editors: was there a medieval military revolution? As with any good undergraduate essay on the topic, the answer lies along the lines of attacking the question, rather than answering it.

There is no doubt that warfare changed between, say 1000 AD and 1500 AD. How much it changed is a bit of a moot point, of course. Various revolutions in military affairs have been found, including the rise of cavalry, the fall of cavalry and the resurgence of infantry. Further, there is the development of the castle and other fortifications and, of course, siege engines and techniques. Slightly surprisingly to me the authors do not cite Clifford Roger’s article on infantry revolutions in the Hundred Years War which dates from 1993, but I suppose there is only so much you can put in.

The most relevant of the factors which are said to introduce the early modern military revolution is the introduction of gunpowder. This, however, dates for the mid-fourteenth century, not the sixteenth. The cannon was used effectively by the French to blast the English out of Normandy and Gascony by the 1450s as the Ottomans were taking Constantinople. Harfleur, which Henry V had to starve out over months in spite of having cannon, lasted a couple of weeks when the French returned in the 1440s. Warfare, at least in terms of positional and territorial control, had changed.

Perhaps the most interesting part of a medieval revolution is the balance between defence and offence in siege warfare. The balance did shift between 1450 and 1530 and so that was a time of more field battles as important positions needed to be besieged (with some hope of rapid success) and relieved, thus forcing actions upon the commanders. After 1530 the pace of campaigning slowed again as the new fortifications came into effect, and battles became rarer.

The upshot is that the editors do not answer their own question (of course) but do observe that there were radical changes in warfare in the medieval period. That extension, of course, calls into question the whole idea of there being a revolution in military affairs at all. If we extend the period of change from, say, the early fourteenth century to the end of the eighteenth century, we hardly have a ‘revolution’ at all, more an evolution. The problem seems to be both the definition of a military revolution and the time frame which we impose on our history. There are continuities and disjunctions all along the line, and the changes which really did take place are part, perhaps of both. We have to have our cake and eat it, it seems to me here, no matter how indigestible it might seem.