As noted last time, I decided to try a full-blown, if limited in scope, map campaign, based around the Parliamentary invasion of Royalist-held Jersey at the end of the civil wars (1652). I had mugged up on the campaign, so far as it was possible, and obtained an old-looking map, as well as a modern road map to make things a bit easier. I had also laboriously created six attribute characteristics for each commander, down to individual ship and company commanders, and typed it all out (so I can still read it; my handwriting can verge on the general practitioner’s level).
The campaign board was thus set up.

Here you can see the main campaign map at the top, printed on A3 paper with the nice hex grid superimposed. I did encounter a bit of a problem in struggling to read the numbers, but I managed, making a mental note to increase the contrast if I ever do this again. The commercial road map is at the bottom left, which also handily shows the beaches, and the orders of battle, unit identifications, and personalities of the commanders are in the two documents pinned to the bottom right.
The various pins in the main map are, of course, the defending forces' initial positions. Jersey had twelve parishes, as I recall, and each had a militia company to call on, so they are in green, except St Helier which has a double company. There is also a company of fusiliers, a troop of dragoons, and another of cavalry based there. The red pins indicate static garrison troops at St Aubin’s Tower, Elizabeth Castle, and Mount Orgueil Castle (east coast). I also decided to give the Royalists a small naval force based in the harbour at St Helier.
The Parliamentary fleet arrived from the northwest and as they came in sight of the island Colonel Block called a council of war aboard Lion, his flagship. After some poor dice rolling on behalf of Block and his senior officers, they decided to do the obvious and attempt to land at St Ouen’s Beach at the western edge of the island. However, the weather was not good and they had to sail up and down for a day or two for it to moderate to a nice if fresh, southerly wind.
In the meantime, couriers had been busy on the island, summoning the militias and other troops to rendezvous on St Ouen’s beach. This process was a little slow but ultimately successful, and much of the militia, plus Carter’s mounted troops and the fusiliers arrived at St Ouen’s Bay before Block’s troops were ready to land.
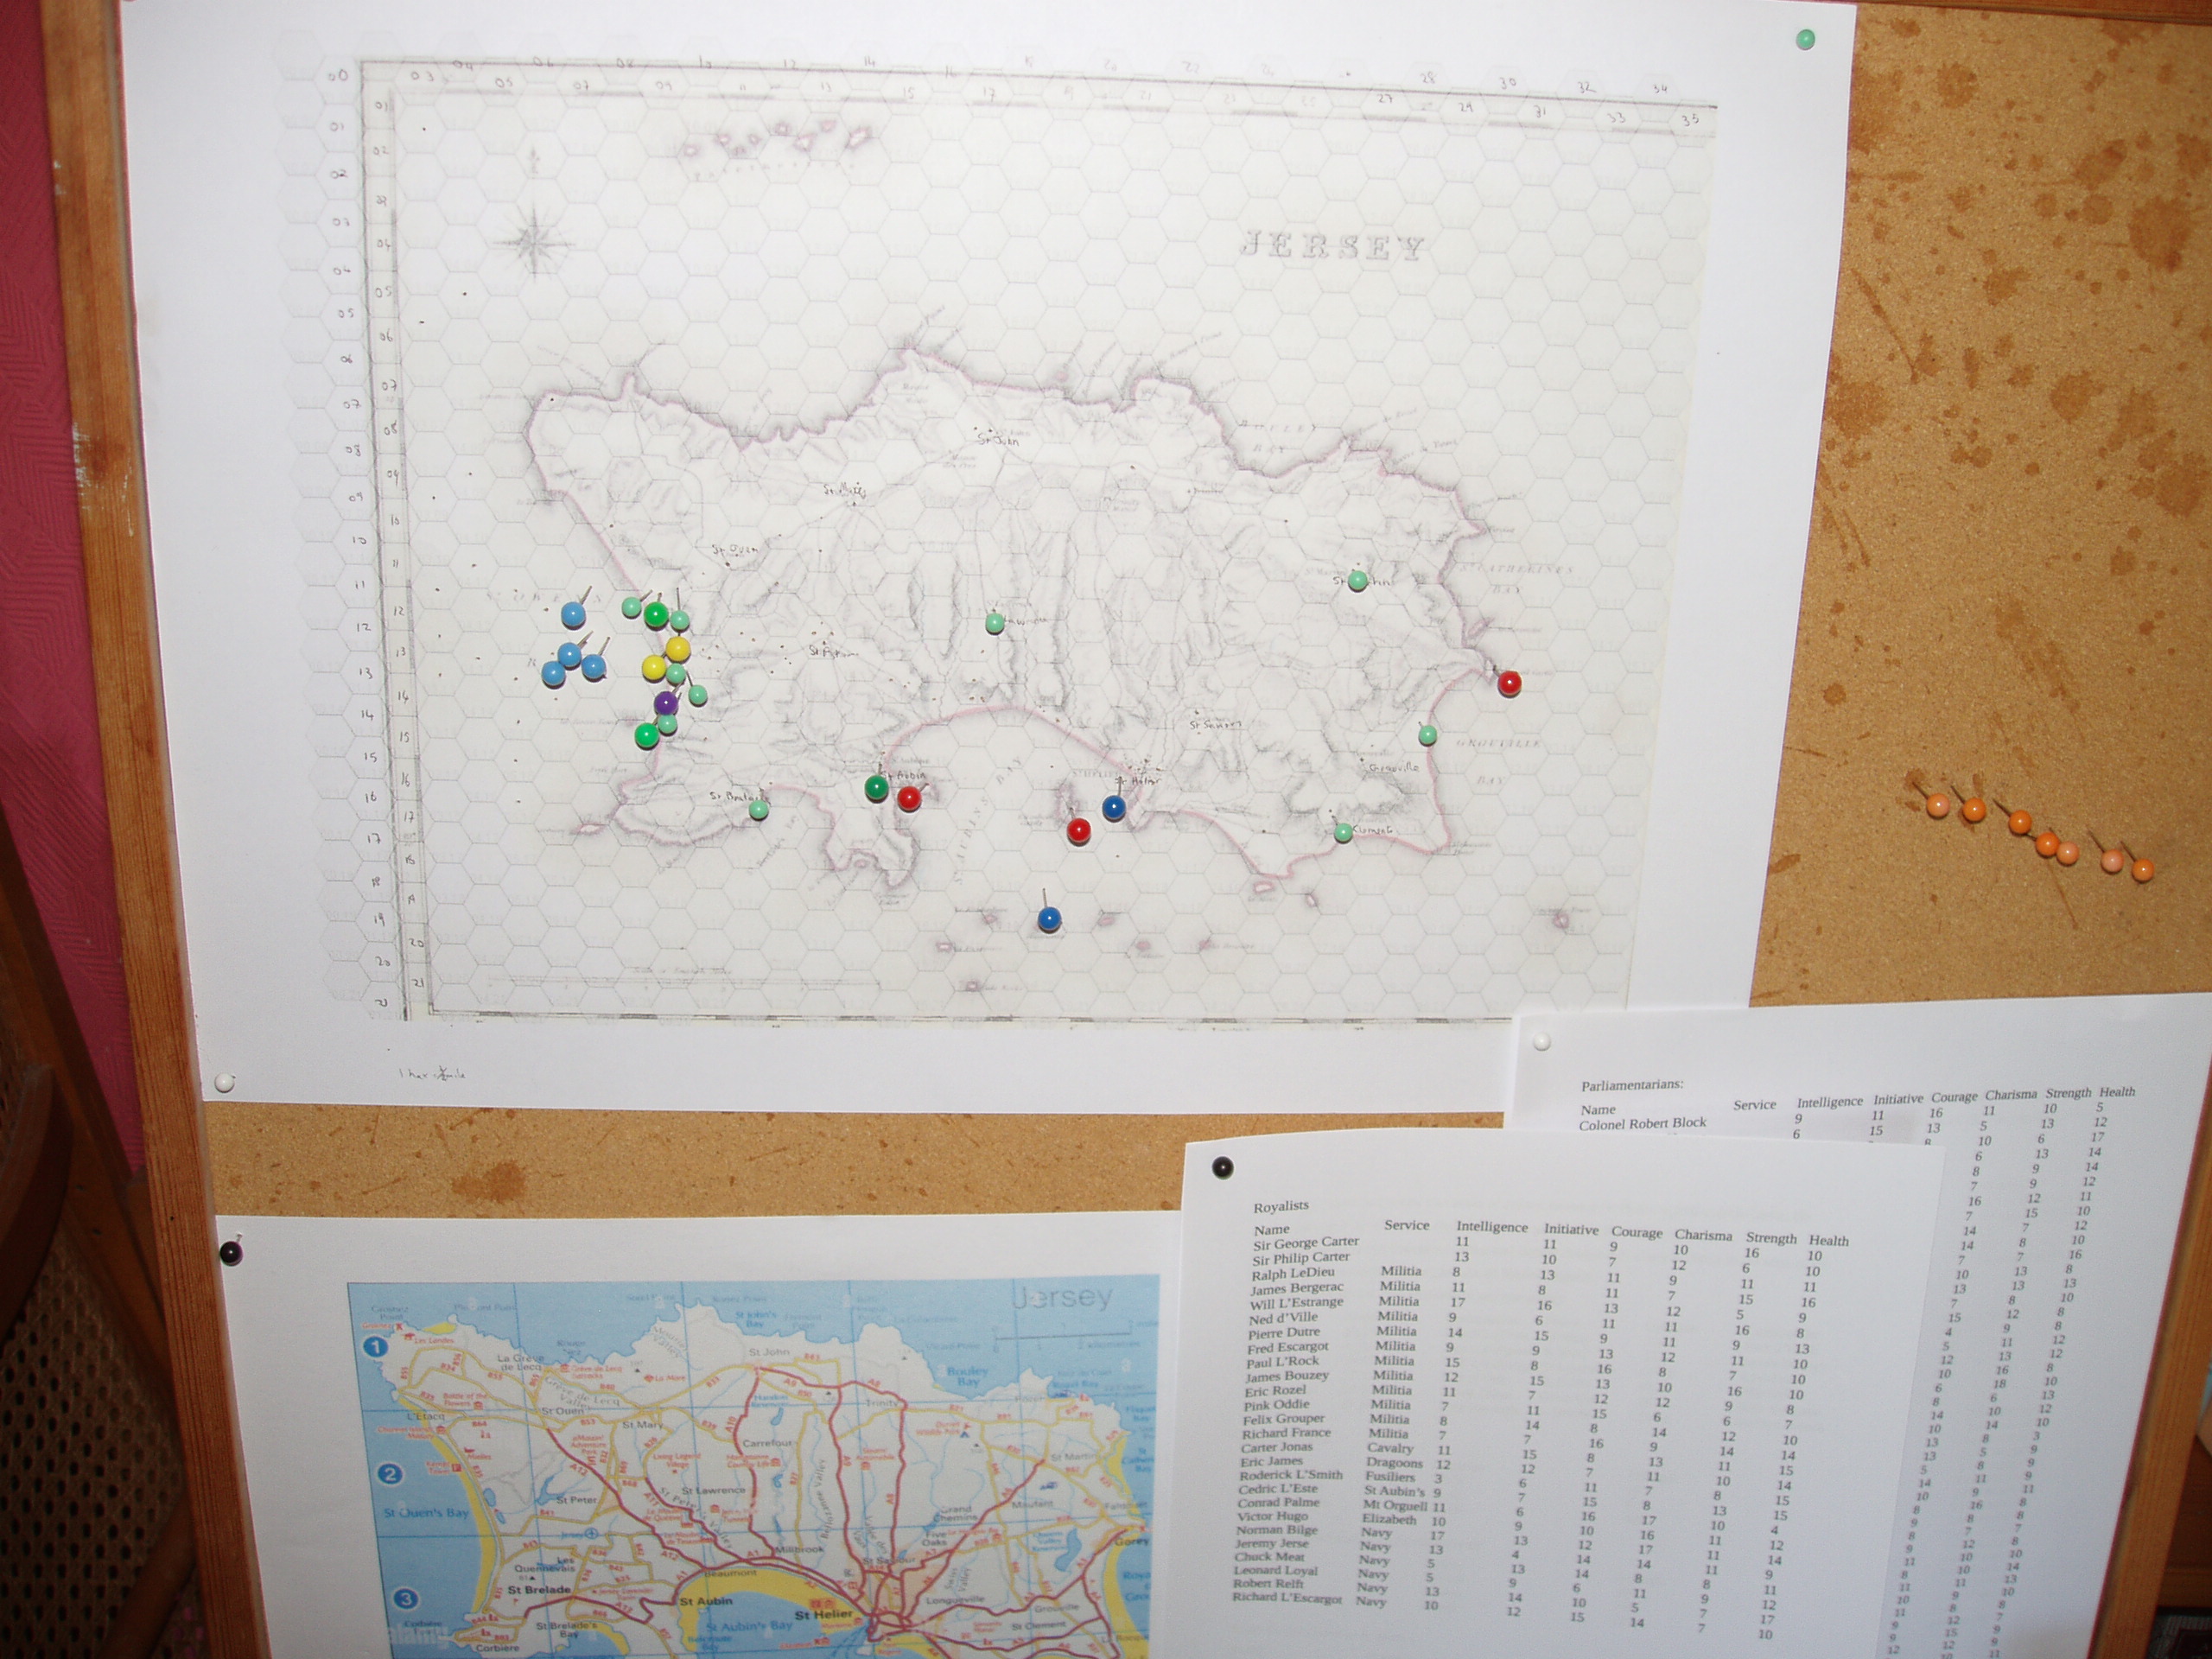
The picture shows the campaign map at this point, with the cluster of Royalist map pins on the shore at St Ouen’s. If you look closely you can see that the Royalist fleet, or most of it, is working its way out of St Helier. This was a bit tricky as the wind was southerly and there are a load of rocks not far out to sea, as you might observe.
I have to confess to a bit of cheating with time and ground scales. The map is about half a mile to a hex, I think, at least given the size of Jersey. After some initial um-ing and ah-ing I decided that foot would move two hexes per map turn and cavalry and couriers four. Naval units would move between one and four depending on the wind strength and direction, alongside tactical considerations – sailing ships can slow down by shortening sail.
I decided on four map moves per day, three in daylight and one at night where the movement rates were halved. I also included the weather. A roll for the wind direction and another for strength, and a roll for the weather conditions themselves. This rather delayed matters for Colonel Block, as the wind for the first couple of days was blowing from the west, which made making landfall at St Ouen’s a bit risky as the ships would be heading for a lee shore. When it shifted to from the north Block struck. I am still not sure about this, because halfway through the game (eight wargame moves equal one map move, by the way) the wind shifted to blow from the northwest, so the fleet was now in danger of being caught again. Mind you the Royalist fleet was also tangled up by the wind and its change in direction having to shift itself back towards St Helier to avoid being driven onto the rocks.
Anyway, the stage was set for a nice little amphibious wargame. To avoid some of the mistakes of the last time around, I put some thought into the naval bombardment. At the Council of War Block had already designated Unicorn and Elizabeth (the fifth rates) to lead the force into the bay and commence bombardment. I decided that the artillery rules would be as normal in my land rule. That is, over four base widths in range you have to roll a six to hit, and then resolve the combat. There is a logic to that which I will explain sometime, but not here.
I reasoned that the naval ships, having cannons in profusion compared to land forces, would count as a certain number of batteries, my reasoning being that more guns at longer range and a more unstable platform would more or less cancel out the range issues. So the merchantmen, if they chose to use them, would have one ‘battery’, one shot, that is, the sixth rates, when they appeared, two, the fifth rates three, and the fourth rate, four.
As for landing, once the ships were anchored in the bay, the company captains would be tested for initiative and those that passed would spend a move loading their men into rowing boats, which would then move at normal speed to land. One anything but a six they would be able to disembark, but would suffer two levels of terrain shaken until they rallied. On the other hand, the Royalist troops were further back than last time, just moving up from their camps.
I hope you want to know what happened next. Well, tune in next week for another exciting episode...
Great looking campaign with ideas to borrow 😁
ReplyDeleteThank you. I am, of course, making it up as I go along....
Delete